
Learn how to render lard at home using a simple crockpot method. This rendered lard recipe creates clean, shelf‑stable cooking fat perfect for cooking and baking.

How to render lard: step by step tutorial
Homemade lard or pig fat is clean, affordable, and really useful for everyday cooking, baking, and traditional recipes. If you’ve ever wondered how to render lard at home, this simple crockpot method is my favorite way to do it.
Rendering lard is similar to rendering tallow. If you’d like to learn more about the differences, see my post on tallow vs lard. I also have a full guide on how to render tallow so it’s odorless and white.
What is rendered lard?

Rendering lard means heating pork fat slowly until it melts and separates from any impurities. Once strained and cooled, it becomes a smooth, white cooking fat. Best of all, it requires very little hands-on time.
How to make rendered lard | Quick look
- Made from raw pork fat (leaf fat or trim fat)
- Slowly heated in a crockpot
- Cooked for 8–12 hours on low
- Strained into glass jars
- Shelf stable for weeks or months
- Can be frozen for long‑term storage
Pin it for later
This post contains affiliate links, which means I make a small commission at no extra cost to you. Get my full disclosure here.
What you need to make homemade lard
You only need raw pork fat and a slow, steady heat source. Using a crockpot is my favorite way to render pork fat into lard because it’s low maintenance. When you’re getting pork fat for rendering, you’ll see different types of fat. The type of fat you use affects the color, texture, and flavor of the finished lard.
Types of pork fat to use
You can render almost any pork fat, but some types work better for certain uses. I’m using chunked leaf fat in this recipe. Lard rendered longer develops a slightly deeper color and roasted flavor, which I like for frying. If I’m using the lard for pastries, I strain it earlier so it stays lighter and more neutral in flavor.
- Leaf fat comes from around the kidneys and internal organs. This is my favorite. It produces the mildest, lightest‑colored lard and is ideal for baking and pastries.
- Trim fat comes from around the meat and is slightly stronger in flavor. It works better for frying.
How to render lard in a crockpot
Ingredients:
- About 4–6 pounds of raw pork fat
Instructions:
- Chop lard into small chunks. You can also use ground pork fat. Frozen fat can be used directly.
- Place all of the raw fat directly into the crockpot. Put the lid on the crockpot and set it to low heat.
- Allow the fat to cook for 8 to 12 hours. You’ll know it’s done when the liquid fat is clear, and the solid pieces are golden and crispy
- Turn off the crockpot and let it cool until the lard is warm but no longer hot.
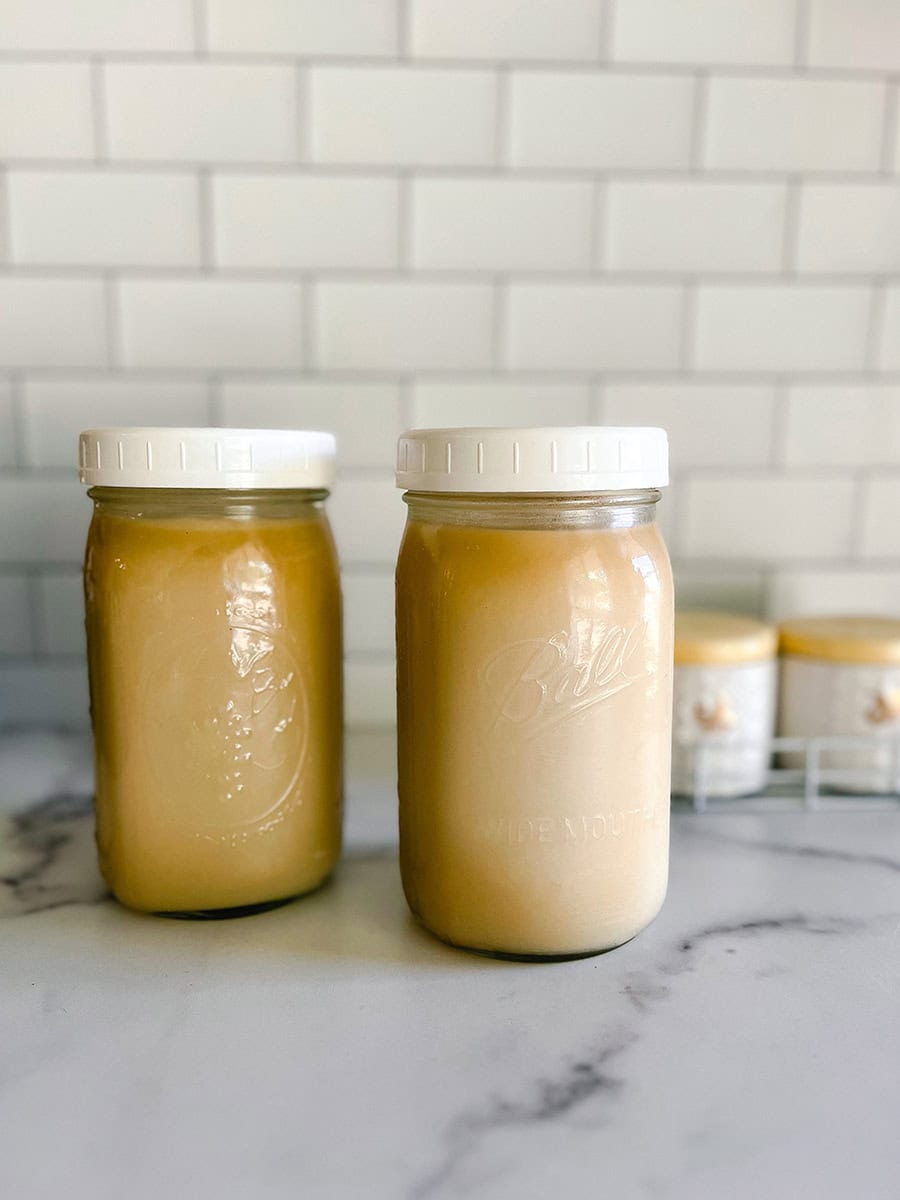
- Place a fine mesh strainer over a glass jar (a funnel helps). Ladle the liquid lard through the strainer into the jars.
- Let jars cool at room temperature. The lard will turn solid and pale as it cools.
Storage, questions, shelf life, and more tips
What to do with the crispy leftovers (cracklings)?
I don’t like letting anything go to waste, so here are a few ways I like to use the leftover crispy pieces:
- Feed for chickens
- Salt and eat as a snack
- Add as a crunchy topping to meals
How do I store rendered leaf lard?
Store your lard in clean glass jars with tight-fitting lids. You can keep it at room temperature for several weeks or refrigerate it, where it will last for months. It can last for years in the freezer. Properly rendered traditional cooking fats last a long time.
What other ways can I render lard if I don’t have a crockpot?
You can render lard on the stovetop in a pot, in the oven, or in a metal colander set over a pan in the oven. If you do any of these methods, be sure to keep the heat low and steady so the fat melts slowly and does not burn.
What’s the difference between wet rendering and dry rendering?
Dry rendering melts the fat without added water. Wet rendering uses water and salt to gently purify the fat.
Is lard or tallow better for skincare?
I think cooking with lard is wonderful, but tallow is better for skincare because it has a wider variety of fat-soluble vitamins (A, D, E, and K) (Source). Lard contains primarily only vitamin D. I love making handmade organic skincare with tallow because it’s super nourishing for the skin.
Tips for best results
- Smaller fat pieces render faster
- Strain while the lard is warm, not hot
- Use a paper towel to remove leftover fat before washing your crockpot
- Letting it render a little longer creates a richer flavor
- Add the lard to ice cube trays and pop out what you need
More helpful posts and recipes
Have you ever tried to render lard at home?
What method worked best for you? Do you prefer using leaf lard or another type? I’d love to hear about your experience. Leave me a comment to share what works for you!
Join our traditional wisdom community, and grab a free DIY home remedy recipe eBook when you subscribe!
[mailerlite_form form_id=3]
Shop this post
Want to shop for more grocery and natural living essentials?
Check out the Bumblebee Apothecary Shop here.
Want to shop for organic handmade skincare products?
Check out the Bumblebee Apothecary Body Care Shop here.
Follow along with Bumblebee Apothecary
Thanks for stopping by! Be well! ![]()
If you make this recipe and love it, please give it 5 stars! Also, tag me on Instagram @bumblebeeapothecary
How to Render Lard

Learn how to render lard at home using a simple crockpot method. This rendered lard recipe creates clean, shelf‑stable cooking fat perfect for frying and baking.
Ingredients
- 4–6 pounds of raw pork fat
Instructions
- Chop lard into small chunks. You can also use ground pork fat. Frozen fat can be used directly.
- Place all of the raw fat directly into the crockpot. Put the lid on the crockpot and set it to low heat.
- Allow the fat to cook for 8 to 12 hours. You’ll know it’s done when the liquid fat is clear, and the solid pieces are golden and crispy
- Turn off the crockpot and let it cool until the lard is warm but no longer hot.
- Place a fine mesh strainer over a glass jar (a funnel helps). Ladle the liquid lard through the strainer into the jars.
- Let jars cool at room temperature. The lard will turn solid and pale as it cools.
Notes
Leaf fat makes the mildest lard.
Recommended Products
As an Amazon Associate and member of other affiliate programs, I earn from qualifying purchases.
-
 Cuisinart Mesh Strainers, 3 Count (Pack of 1) Set, CTG-00-3MS Silver
 -
32 oz Wide Mouth Mason Jars with Airtight Lids and Bands, 12-Pack with Extra 4 Lids, Tags & Twine, Quart Glass Canning Jars for Overnight Oats, Pickling, Food Storage, DIY Crafts, Wedding Favors
-
Hamilton Beach Slow Cooker, Extra Large 10 Quart, Stay or Go Portable With Lid Lock, Dishwasher Safe Crock, Black (33195)


The information in this blog post is my personal experience and opinion. It is for general information purposes only, may not apply to you as an individual, and is not a substitute for your own physician’s medical care or advice. Always seek advice from your physician or another qualified health provider with any questions you may have regarding nutrition, medical conditions, and advice. Never disregard medical advice or delay seeking medical care because of something you have read on this blog.